This article contains the following sections:
- I. Newsletter Broadcast Overview
- II. How to Activate Newsletter Broadcast
- III. How to create a Newsletter
I. Overview
Newsletter Broadcast is a tool that helps in your marketing efforts by allowing you to create and send professional-looking newsletters easily.
This service allows you to send your newsletter up to 100 contacts (recipients).
It is included as a feature with the following hosting plans - Grow Essentials and Grow Complete.
II. Activate your Newsletter Broadcast:
1. Sign in to SiteControl with your username and password (click for instructions).
2. Click on the Newsletter Broadcast menu under the Manage Services section.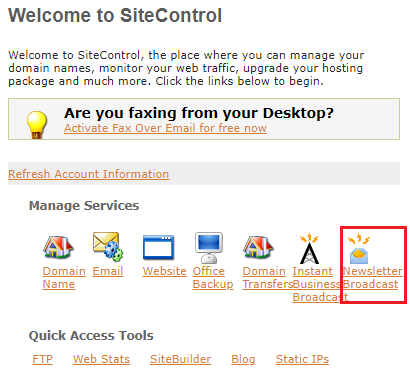
3. Select the proper domain name from the Currently Managing drop-down menu and click on the Activate button.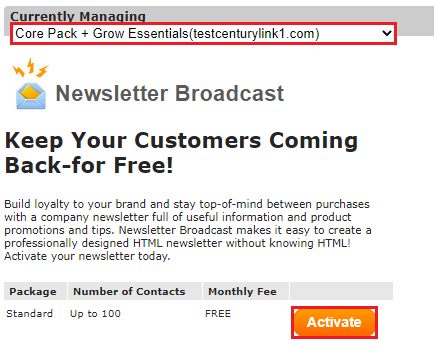
4. Once the product is active, it will be listed under the Newsletter Broadcast section. Click on the Access button to log in to your profile.
III. Create a Newsletter
1. Click on the Create a New Newsletter button.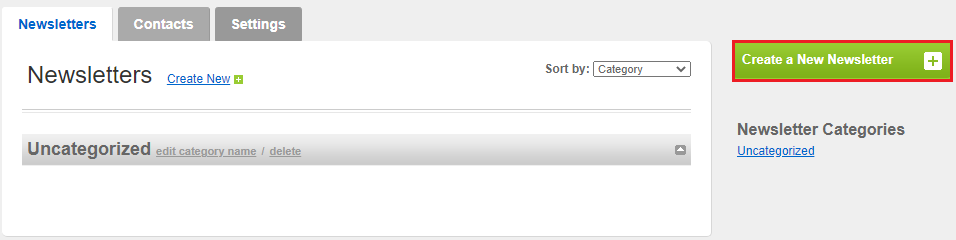
Type the name of the new newsletter. The name is not displayed to subscribers. Click the Create
button to continue to the next step.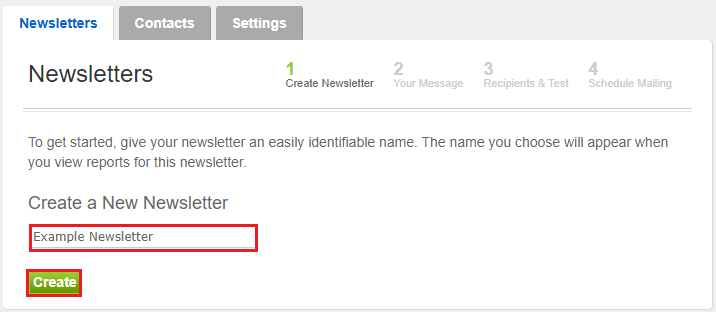
2. Your Message
The second step involves composing both HTML and text versions of the newsletter. Why two formats of the same newsletter? Some subscribers may have their email client set to not display HTML. Those that
do will see the text version.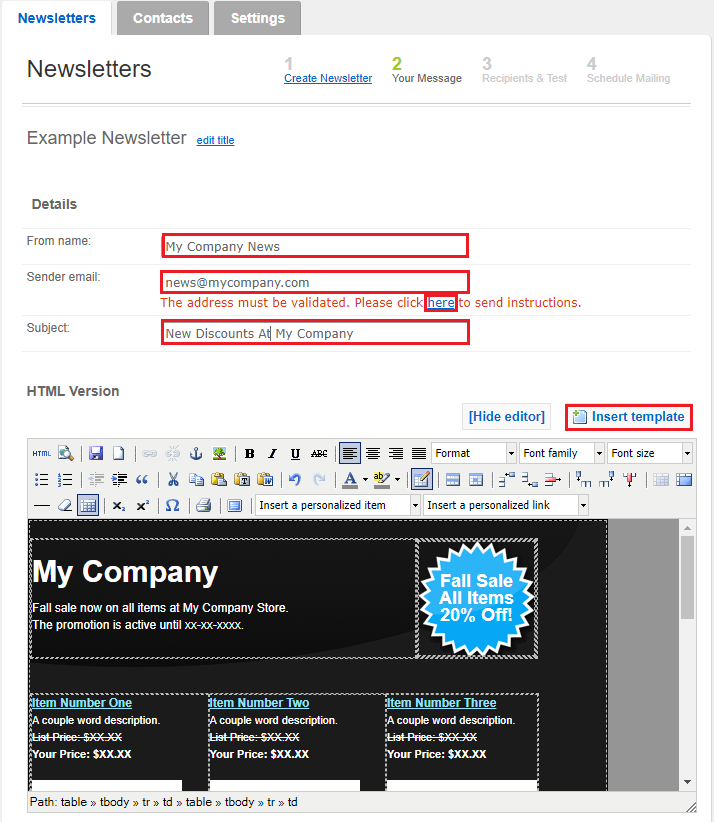
In this Step, Enter the:
From Name:
Sender email: (The address must first be validated, click on the button as seen above to send instructions).
Subject:
The HTML version can be composed using the WYSIWYG editor or source view by clicking the HTML
button.
Aside from the typical WYSIWYG editor options, two newsletter-specific options display for both
the HTML and text version of the email.
Users can use one of ten newsletter templates by clicking the Insert Template button. In addition,
advanced users can upload custom templates to reuse on different newsletters.
Personalization Item
ID. Subscriber’s unique numeric number assigned by Newsletter Broadcast.
Email. Subscriber’s email address.
First Name.
Last Name.
From the Insert a personalized link you can add:
Forward this email - Link displays as “Forward this email to a friend”
Subscribe to the list - Link displays as “Subscribe to this mailing list”
Unsubscribe from the list - Link displays as “Unsubscribe from this mailing list”
Unsubscribe globally - Link displays as “Unsubscribe from this sender”
Show email - Link displays as “Display this email in your browser”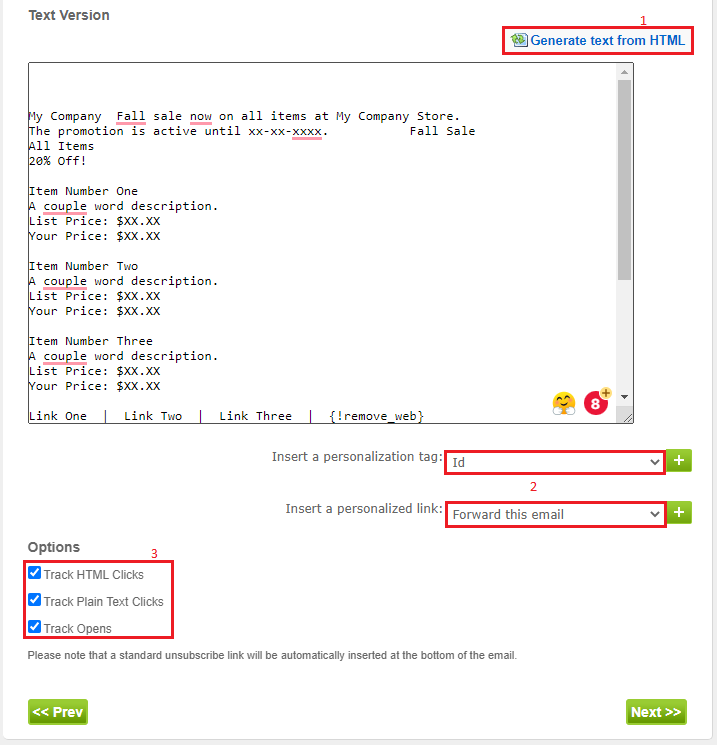
2.1 Click on the Generate text from HTML in order to generate the text-only field.
2.2 Use the Personalization tag, and Personalized link if needed.
2.3 Tracking options selected here are displayed in the newsletter report.
Note: The text version can be left blank. However, the HTML version cannot.
Once done, click on the Next button.
3. Recipients & Test
3.1 Create a new Contact List or select one if already created.
Enter the name of your new list and click on Add.
- In the next step select the type of permission for this list.
- Enter the Default Sender - From Name and Sender Email.
- Select to import contacts via .csv file or to manually add the contacts.
- Click on the Save button to proceed to the next step.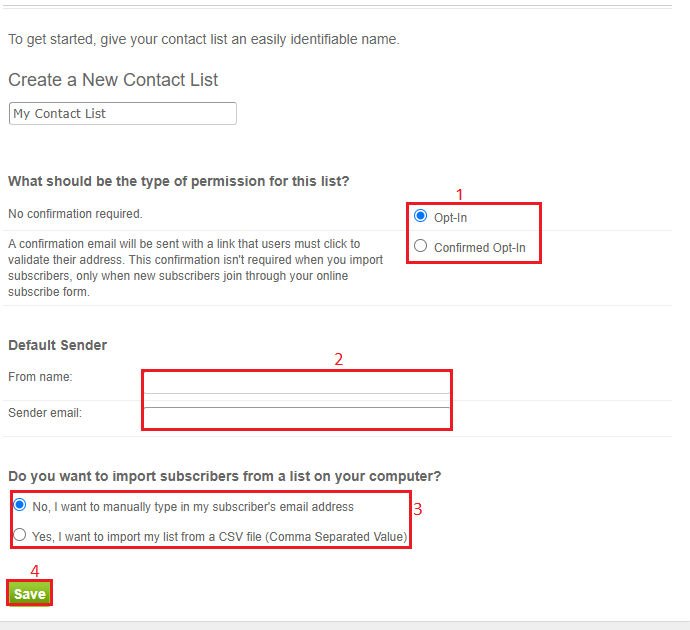
3.2 The contact list can be created by manually typing the subscribers’ name, email address and other
relevant details in the text field.
Click Add subscribers to continue.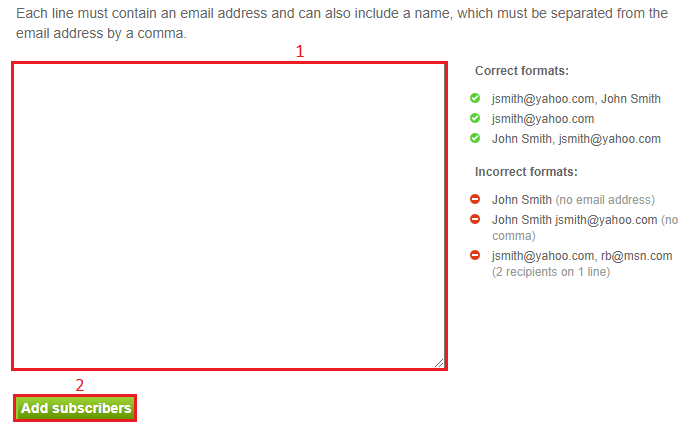
3.3 Users must define each field by using the drop-down list to select Email Address, Skip This Column,
or Create New Field. Selecting “Skip This Column” does not add the data to the recipient list.
Click the Import these subscribers button to continue.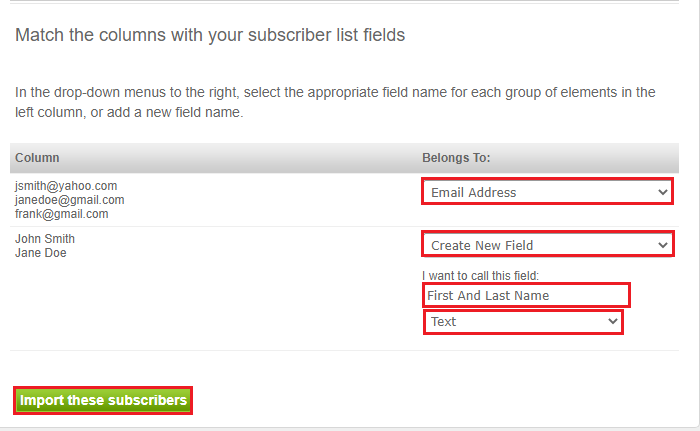
Note: You will receive the Import Finished message. If there is an error click on the EXPORT ALL ERRORS button which will generate a .csv file for you to review.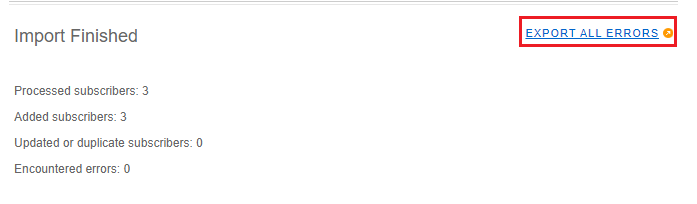
You can now go back (Click on Newsletters find and click on the name of the Newsletter, click next, and choose your recipient list).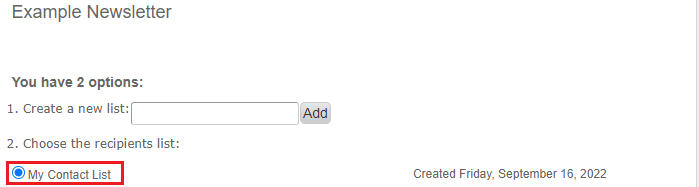
Click on Next to proceed to step 4.
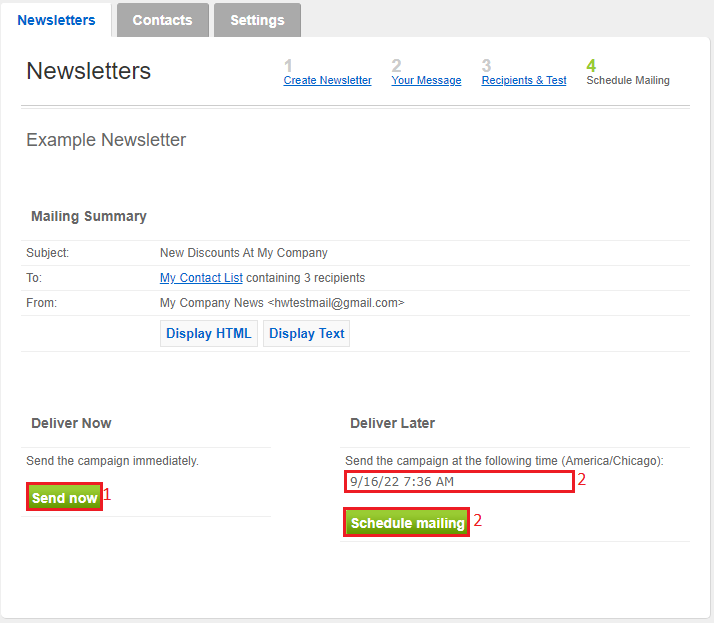
4. Schedule Mailing
The last step in creating a newsletter is the sending of the newsletter to the contact list. At this step,
users can still make any changes to the newsletter or the contact list.
Here you have 2 options:
4.1 Click on the Send now button in order to send the newsletter campaign immediately.
4.2 Click on the Date/Time field in order to schedule the campaign for a specific period in the future and click on the Schedule Mailing once you have selected the specific time frame (Note the TimeZone).