This article contains the following sections:
I. Autoresponders
An autoresponder is an email account that automatically replies to all incoming messages with a predefined message. Autoresponders are particularly useful when you want to send a confirmation that a message has been received. For example, you could set up an autoresponder email address, information@sampledomain.com, that your visitors use to request information about your company. Each time an email comes into this address, it would automatically reply with the information you specified (about your company).
![]() To create an autoresponder:
To create an autoresponder:
1. Log into SiteControl with your username and password (click for instructions)
2. Under the Manage Services menu select Email.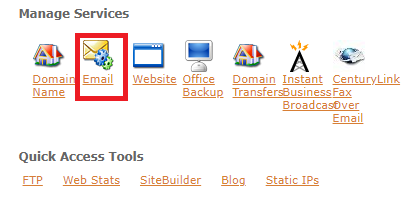
3. Click on Qwest Office Email or Vanity Domain Mail. If the intended address for the autoresponder has not yet been created, then click Create Email Address button (if you want to enable it for existing mailbox click on Edit under the Actions menu).
4. The Edit Email Address page appears. You can only add one autoresponder to an email address. The existing autoresponder needs to be deleted before you add a new one. If you do not need to delete your existing autoresponder option, check the box next to Auto-Responder: Send an automatic reply to senders.
5. Next, Enter the Subject of the autoresponder in the Subject field. Ex. On Vacation.
6. Enter the message directly into the text box. Type the message exactly as you would want the recipient to read it.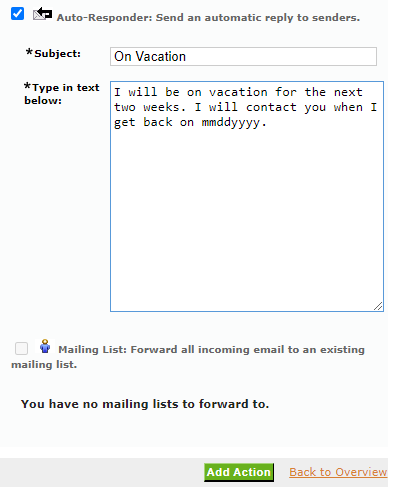
7. Click Add Action. Your new autoresponder message appears in the Email Options section of the Edit Email Address page. Note that you can edit or delete your autoresponder by clicking on the Edit and Delete links.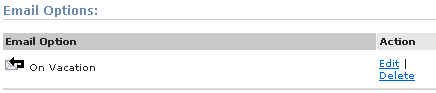
II. To forward e-mail from one account to another:
1. Log into SiteControl with your username and password (click for instructions)
2. Under the Manage Services menu select Email.
3. Click on Qwest Office Email or Vanity Domain Mail.
4. Click Edit next to the email address. 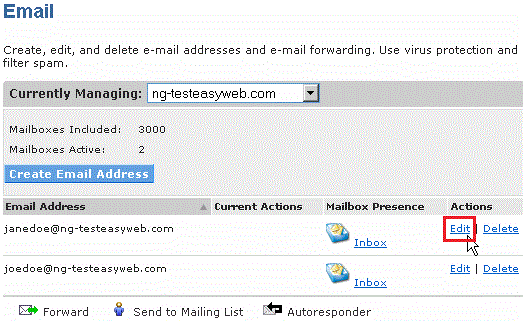
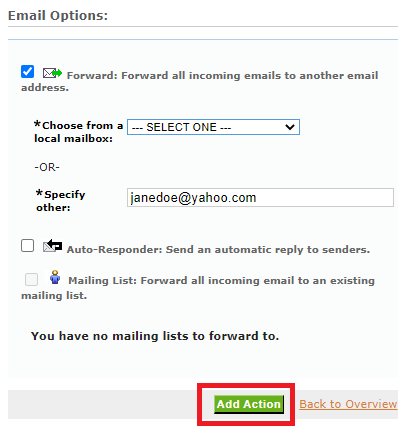
5. In the Email Options section of the Edit Email Address page, check the box next to Forward.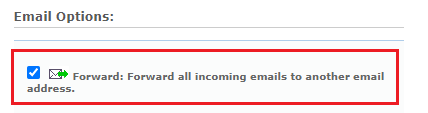
6. Enter the email address that you want to forward messages to into the Specify other: field
(example: janedoe@yahoo.com), or select an existing mailbox from the Choose from a local mailbox: dropdown menu.
7. Once done click on the Add Action button.