The Address Book is used to save e-mail addresses and other information about contacts. You can enter personal information about a contact, such as birth date and address, as well as save several e-mail addresses for the contact. After you create a contact you can quickly select that contact's e-mail address when composing e-mail. If you have created and saved contacts in another program, you can import a copy of those contacts into CenturyLink Webmail.
You can also create groups of your contacts. This is helpful when you need to send the same e-mail to several of your contacts at the same time. In addition, you can edit or delete a contact or group at any time.
For more information about using the Address Book, see one of the topics listed below:
I. Adding Contacts
1. Log into your CenturyLink Webmail interface with your mailbox credentials.
2. Open the Address Book by clicking on Addresses on top of the toolbar.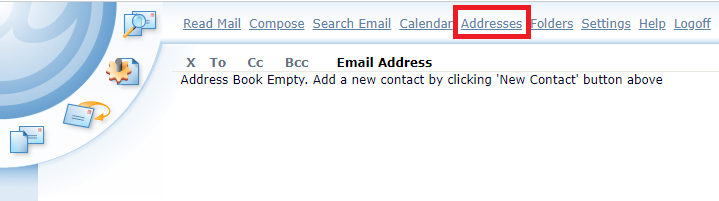
3. Click the New Contact button on the toolbar.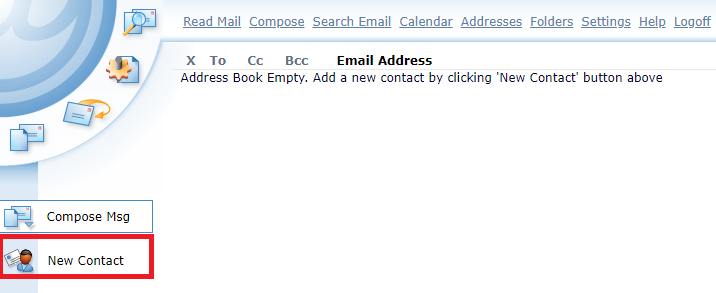
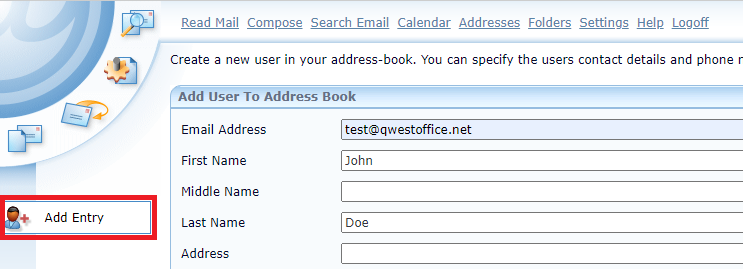
4. In the window that appears, enter the information for the contact.
-
On the Add User To Address Book tab, you must enter a first and last name for the contact (in addition to the e-mail address) but all other information such as birth date and gender are optional.
- On the Business tab you can add additional information about the new contact. None of this information is required to add a contact.
5. Once all the needed information has been added click on the Add Entry button.
6. You are returned to the Address Book and the contact you just added appears in the list.
- To send an e-mail to the new contact, click on the contact name.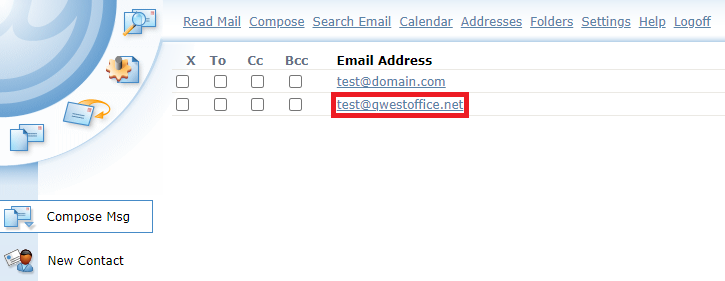
- There are options to Send the message, Add Recipients, Add BCC, Attachments, and Save Msg -this will save the message to your Draft folder. To go back to your Inbox, click on the Read Mail menu.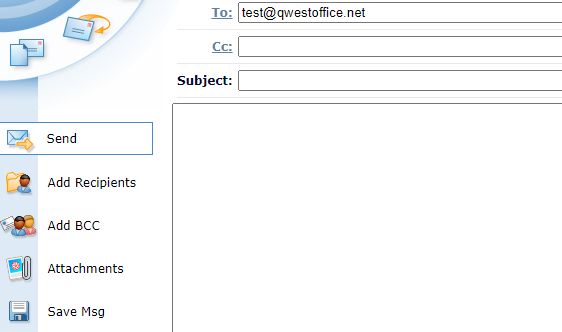
II. Adding Groups
1. Log into your CenturyLink Webmail interface with your mailbox credentials.
2. Open the Address Book by clicking on Addresses on top of the toolbar.
3. Click the New Group button.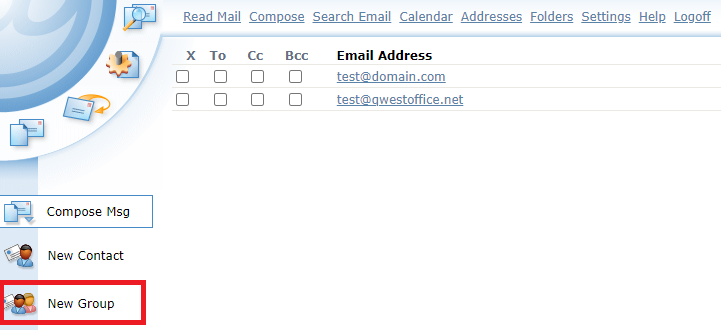
4. In the window that appears, in the Group Name field, enter a name for the group.
If needed, click the Group Details tab and enter information about the group such as address. You can also add some notes about the group on this tab.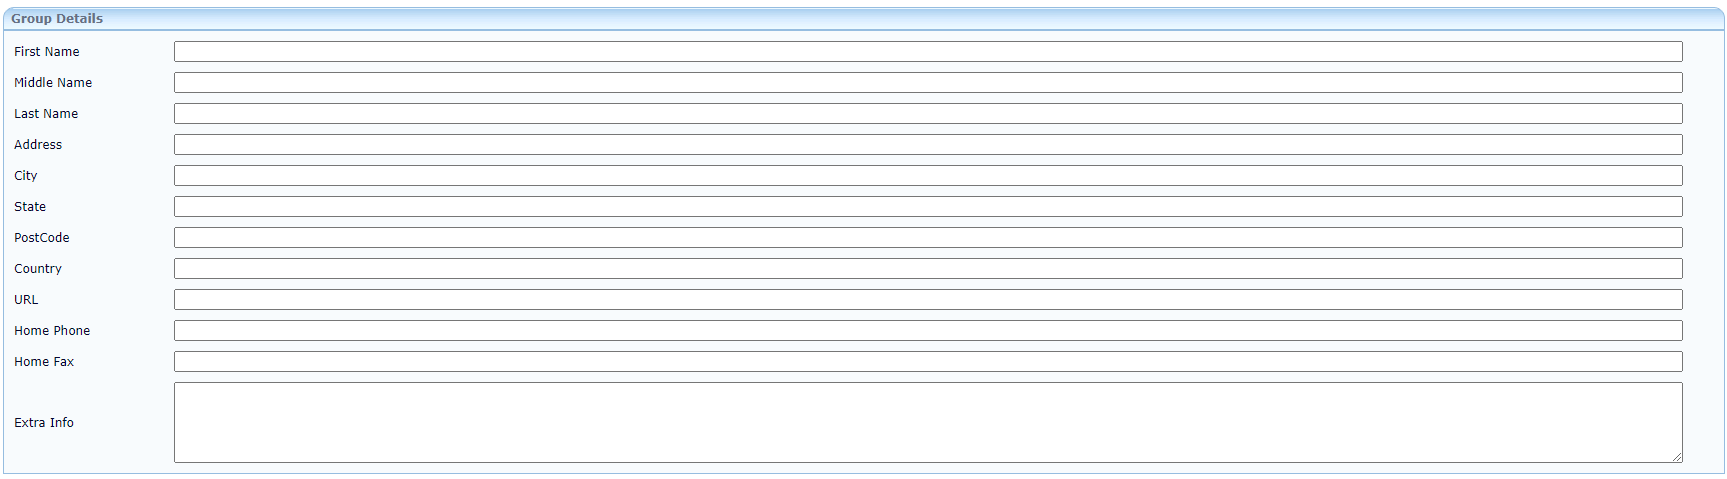
5. On the Group Emails tab, select a contact you want to add to the group and click Add.
6. Continue adding contacts to the group. When you are done, click the Add Entry button in the toolbar at the top of the window.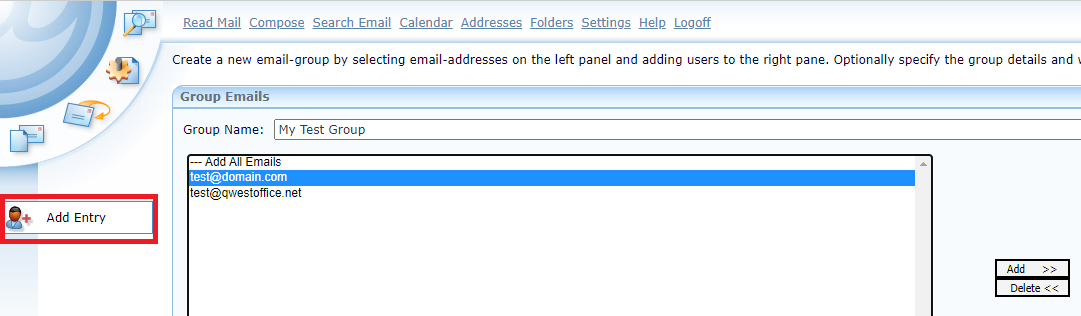
You are returned to the Address Book and the new group you created appears in the list.
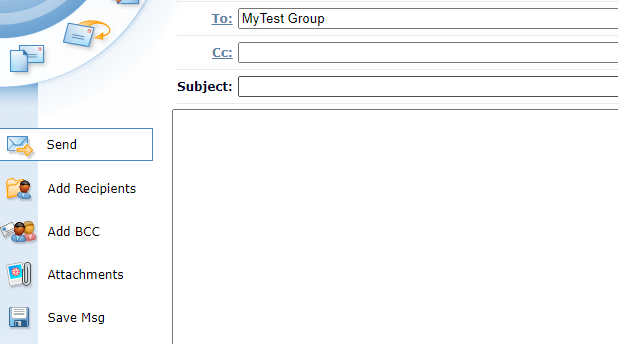
- If you want to send an e-mail to the new group, click on the group name.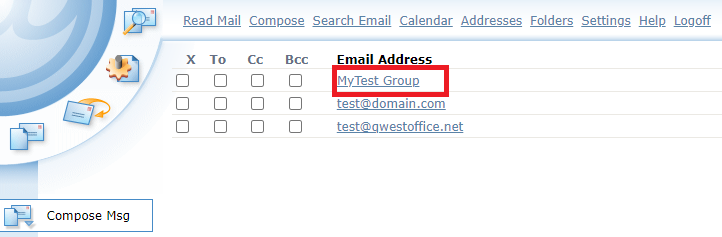
- There are options to Send the message, Add Recipients, Add BCC, Attachments, and Save Msg, in order to save the message to your Draft folder. To go back to your Inbox, click on the Read Mail menu.
III. Importing an Address Book
You can import an address book or contact list into CenturyLink Webmail. The address book or contact list must be exported from the program in which it was saved, and it must be exported as a Comma Separated Values (CSV) file. A CSV file is a text file with data separated by commas.
If you want to import your address book from another e-mail program such as Microsoft Outlook® you must first export the file in that program. Make sure that when you export the file you export it in CSV file format.
1. Log into your CenturyLink Webmail interface with your mailbox credentials.
2. Open the Address Book by clicking on Addresses at the top of the toolbar.
3. Click on the Import button on the left side menu.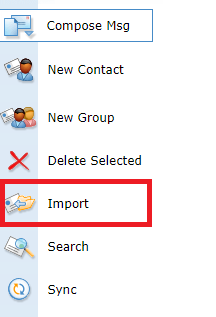
4. Click Choose File. Now locate the CSV file you exported from the program where you created and saved your address book or contact list and click Open.
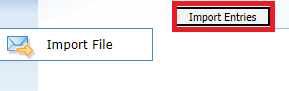
5. Click Import File to import the file into your address book.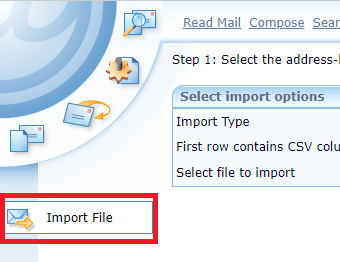
6. When the Match field names screen appears, review the matches CenturyLink Webmail has made to the Address Book fields and the data in your CSV file.
In the example below, the fields listed on the left are the fields used in the Address Book. The lists (fields) on the right represent the data in your CSV file. Your lists will look different than the ones below based on the type of data you exported with the CSV file.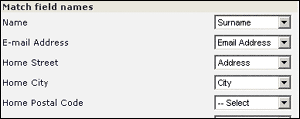
CenturyLink Webmail will attempt to match the data in your CSV file to fields in the Address Book. If a match cannot be made, "Select" will appears as it does in the last list of the example below. Select the data you want to match to the Address Book field before continuing.
7. Make sure that the E-mail Address and Name fields are matched to the e-mail address and name data in the CSV file. Also make sure that the rest of the fields are matched with appropriate data, however as long as you have matched the e-mail address and name fields your import will work as expected.
8. When you are done and ready to complete the import, click Import Entries. When the import is complete you will be notified of the number of contacts added to your Address Book.