This article contains the following sections:
- I. Webmail Overview
- II. E-mail Settings menu
1. Webmail Preferences
2. User Profile
3. Autoresponder
4. Password
5. Mail Forward
6. Quota Information
7. Black/White List Manager
CenturyLink Webmailis made up of folders and utilities that you access using the navigation pane on the left side of the screen.
By default, your start page loads when you log on to your account. From the start page, you can see a summary of the messages in your Inbox, monitor your mailbox size, view your login history, and access the folders and utilities in your account. If you want to bypass the start page and have your Inbox load when you log on, select the option at the bottom of the screen.
In order to open your Webmail interface go to - https://webmail.centurylinkoffice.net/ and log in with your mailbox username and password.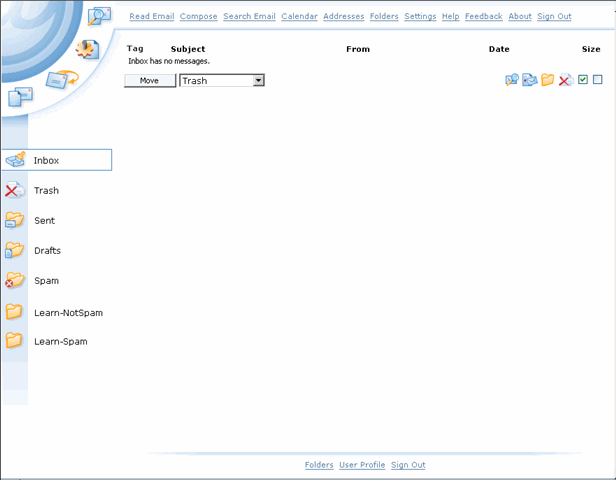
The e-mail settings are used to change the preferences for your account. From the E-mail Settings, you can change your font, the "reply to" address, and the date and time format. Use the default editor function to select the editor you want to use when composing an e-mail.
1. On the navigation pane, click Settings
2. The Webmail Preferences tab opens. The following is a summary of the settings:
- Displayed Name – What appears when you compose e-mail. Your full name will appear in outgoing e-mail.
- Reply To – The address where you want replies sent, if different from your CenturyLink Webmail account.
- Sort E-mail By – How you want e-mail to sort when viewed in your Inbox and folders.
- Default Font Style – The font used in the interface.
- Service Language – The language you want to use in the interface.
- Number of Messages to Display – The number of messages that will appear in the Inbox.
- Select Time Zone – The time zone where you live. This is used to display the correct time and date on e-mail.
- Specify default mail-encoding – Select the default e-mail encoding type. By default it is UTF-8.
- Block images in email messages – Optionally select to block URL-referenced images in messages.
- Message Pop-up – This allows you to view a summary of a message when you hover the cursor over a message.
- Auto Delete Trash – Automatically delete messages sent to the Trash folder.
- Delete Trash on Logout – Used to automatically empty the Trash when you log out.
- HTML Email Editor – Used to select the HTML editor as your default e-mail editor.
- Time Format – The format used to display the time in the CenturyLink Webmail E-mail and Calendar interface.
- Date Format – The format used to display the date in the interface.
- E-mail Signature – The signature that will appear on any outgoing e-mail.
Once done, click on the Save Settings button on the left-side menu.
 2. User Profile
Your user profile contains information about you and your account. You can change the information in your user profile as needed.
- To change your user profile:
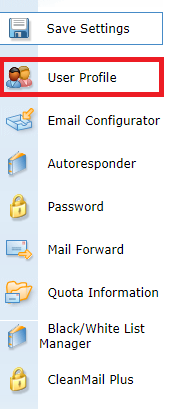
- On the navigation pane on the left of the window, click User Profile.
2. Change the information in your profile as needed. Enter the Personal Details,
Contact Details, Mailing Details, or Additional tabs to enter information in these areas.
3. When you are done changing your profile, click Save Settings.

3. Autoresponder
The Auto-Reply feature automatically sends a reply to each email received. This feature is useful during extended periods of time when you are unable to answer email to this account.
Change the Autoreply Status: to Enable. Once this is done enter the Autoreply Text: in the field.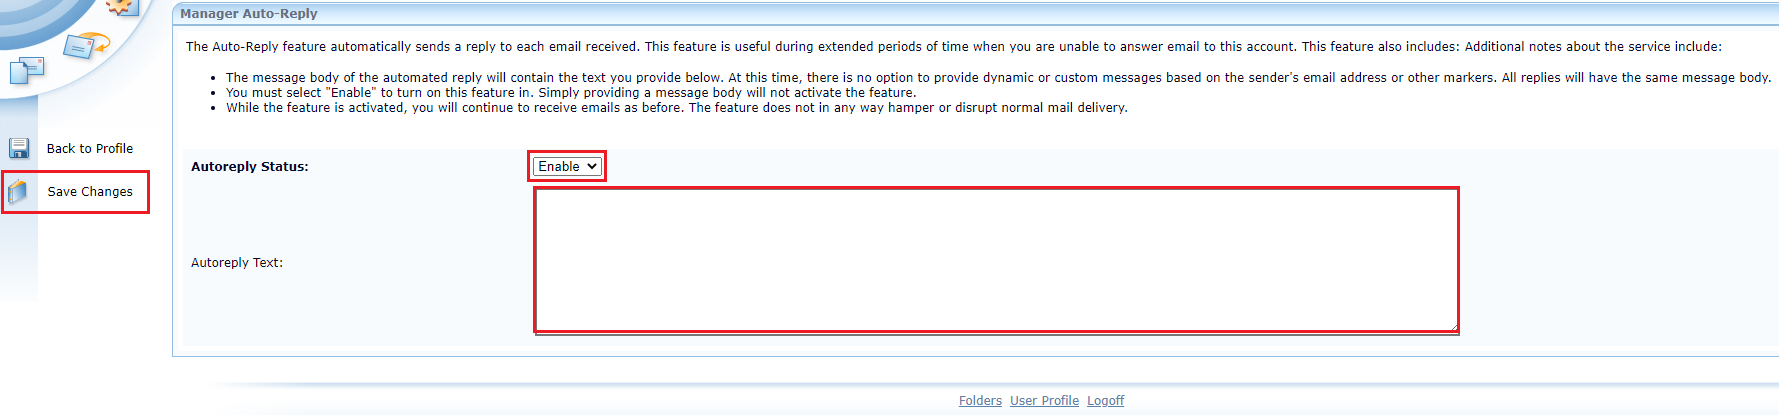
Once done, click on the Save Changes button on the left-side menu.
Note: If you need to enable the Auto-Responder from the SiteControl interface, follow this article.
4. Password
If you need to update your mailbox password from the webmail interface, first click on Settings then select the Password menu.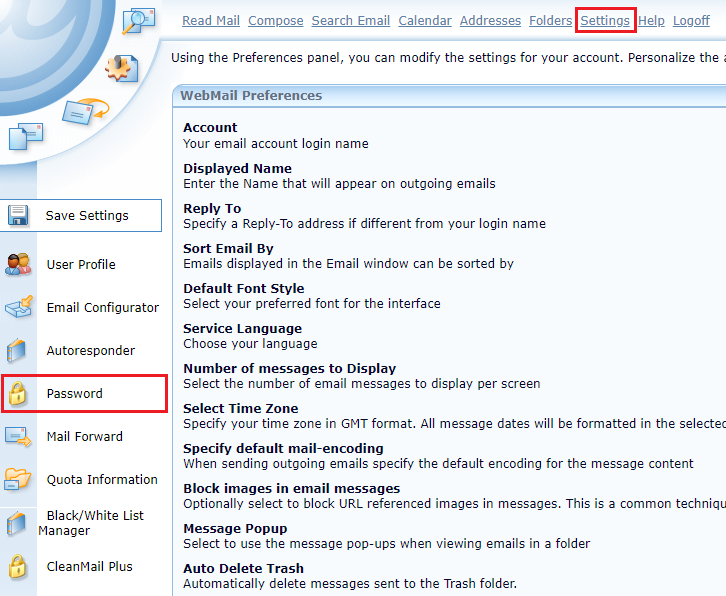
On the next page, you will need to enter your Current Password, after that the New Password and Confirm New Password.
Password security requirements are:
- The password must not start with the phrase "pass"
- The password must not contain part of the domain name
- The password must not contain part of the email address
- The password must contain at least one letter
- The password must contain at least one number
- The password must be at least eight (8) characters long

Once done, click on the Change Password button on the left-side menu.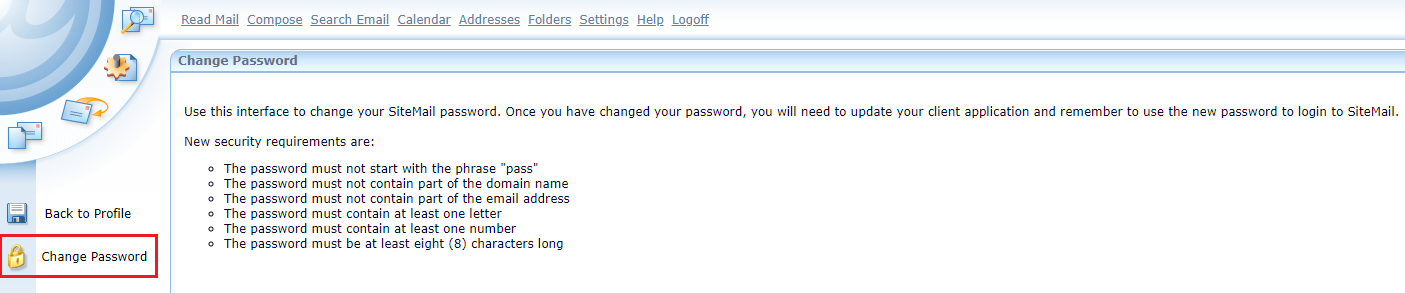
The next time you log in to your webmail you will need to use your new password. Keep in mind that the password should be updated on all of your e-mail client applications and mobile devices as well.
5. Mail Forward
The Mail Forwarding feature sends a copy of each email received to up to 4 email addresses that you specify below. This feature is useful when you have setup a general email account, such as support@mydomain.com, and want a copy of all emails sent to this address to also be sent to other email accounts.
In order to access that menu click on Settings from your webmail interface and select Mail Forward from the left side menu.
Enter up to 4 E-Mail addresses that you want to forward mail to, click on the Delete button if you need to remove an existing forwarding email address.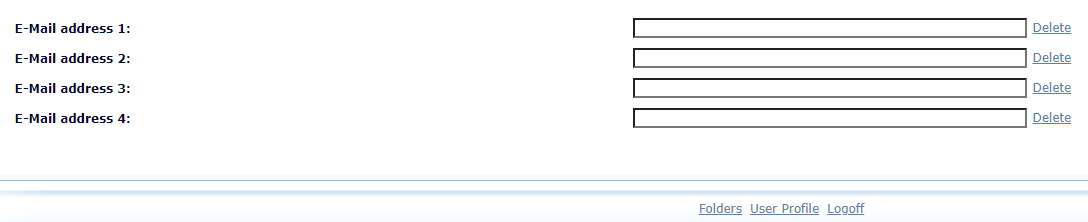
Once done, click on the Save Changes button on the left side menu,
Note: If you need to configure E-mail Forwarding from your SiteControl account, please follow this article.
6. Quota Information
To check your mailbox quota usage click on Settings and select Quota Information on the left
side-menu.
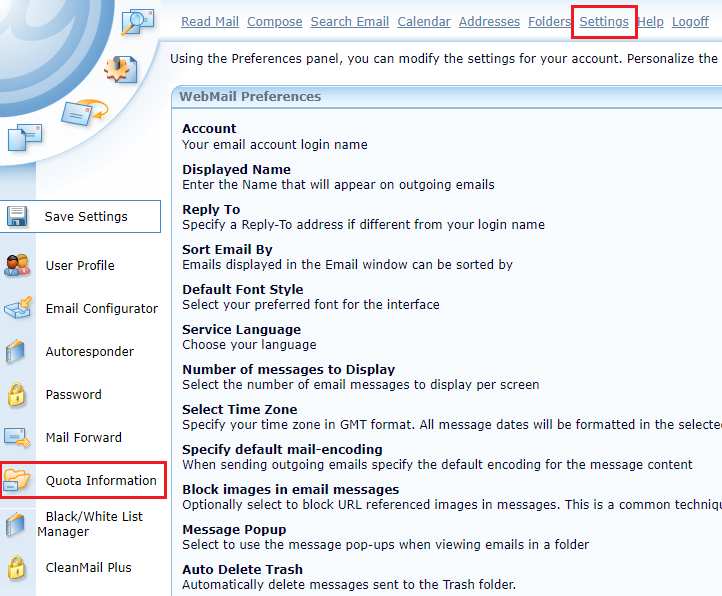
Information will be displayed about the Disk Quota: (limit for the mailbox), current Disk Usage: and the percent of the mailbox usage - Percent Use:.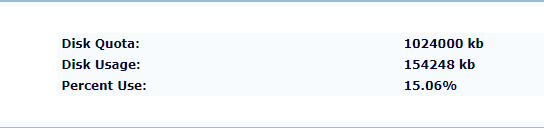
7. Black/White List Manager
A blacklist enables you to specify email addresses from which all incoming email messages are automatically blocked. A whitelist enables you to specify the email addresses from which email messages should never be blocked.
You can enter a full email address, such as myemail@mydomain.com, or a partial email address that begins with the @ symbol, such as @mydomain.com. Remember that emails blocked by the blacklist cannot be retrieved.
- To create a new Black List entry use the left menu that is displayed, once you have entered the needed email address click on Add.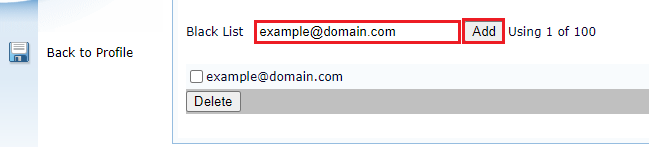
- To delete a Black List entry, select the checkbox next to it and click on the Delete button.
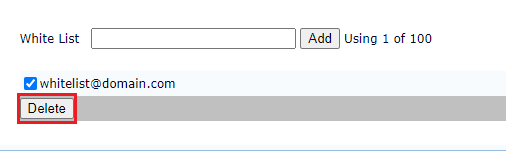
- To create a new White List entry use the right-side box displayed, once you have entered the needed email address click on Add.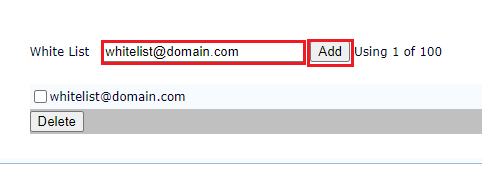
- To delete a White List entry, select the checkbox next to it and click on the Delete button.